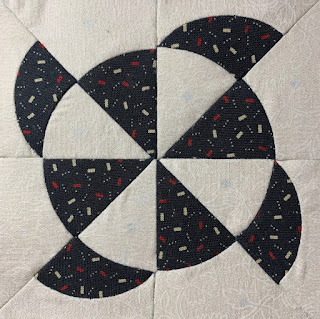
C-4
C-5
I loved making this block, I never realized how easy little curves are to do until I tried them with EPP.
I did have a little trouble getting the center points perfect. There is a lot of fabric points coming together there. I can do it on a machine, but I haven't mastered it by hand. But, right now my motto is "Better finished than Perfect" That's a big step for me.
Remember, the outside portions of this circle are directional, mark your pieces so that you put your fabrics on the correct sides.
C-6
Another curvy block. I enjoyed making this. I did snap some photos of a couple things that I did as I made this block.
When I pieced this, I pieced the outer sections first. I think it was easier in the long run to do this in sections.
Another thing that I have learned when making this quilt (as I said this is my first EPP project) is what I guess is called flat back stitching. I have a friend that actually lays her pieces on a surface and stitches. I find that really difficult. I couldn't get a picture, but I hold the pieces in my hand and catch the fabrics on the back. the stitches don't show through to the front.
Another thing I do that I find makes it easier to get a perfect fit, I throw a few stitches in each end to secure then start in an end and work to the middle. By then I usually need to change thread, so I start at the other end and work to the middle. A perfect way to ease a piece in nice and flat.
The last few blocks that I've made, I have tacked an end and then taken several "basting stitches to the other end. Then I turn and sew properly. The piece is already basted in and I know it will fit perfectly.
I hope that this helps you! T


No comments:
Post a Comment